SSH Without Port Forwarding
Exposed ports can attract unwanted scans, and incorrect router setups risk your network's security. If you want to SSH to your server without exposing any ports here's an alternative that uses Cloudflare Tunnel.

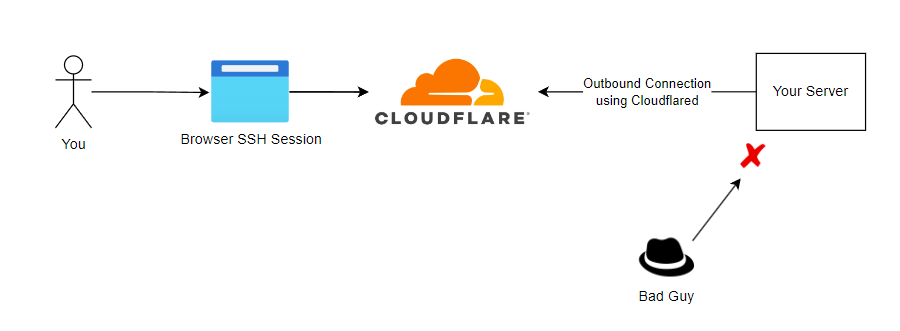
Here's what this solution looks likes architecturally once we're done.
Once this is setup, it can also be extended to serve websites and other services as well without exposing any ports to the internet however that's beyond the scope of this article.
Prerequisites:
- A registered domain name
- A chosen subdomain for SSH (we'll be demonstrating this with ssh.eddiez.me)
- A Cloudflare account
- The domain is imported into Cloudflare as the DNS provider
To set this up in Cloudflare, we need to create two components in the "Zero Trust" portal.
- A Cloudflare tunnel
- A Cloudflare Access 'application'
Creating the Cloudflare Tunnel
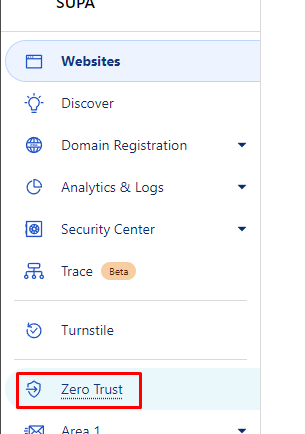
Access the Zero Trust portal from the main domain selection page using the navigation on the left.
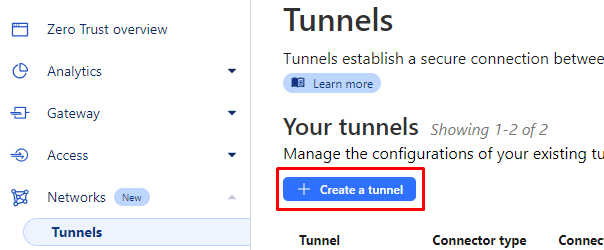
Then go to Networks -> Tunnels to create our tunnel.
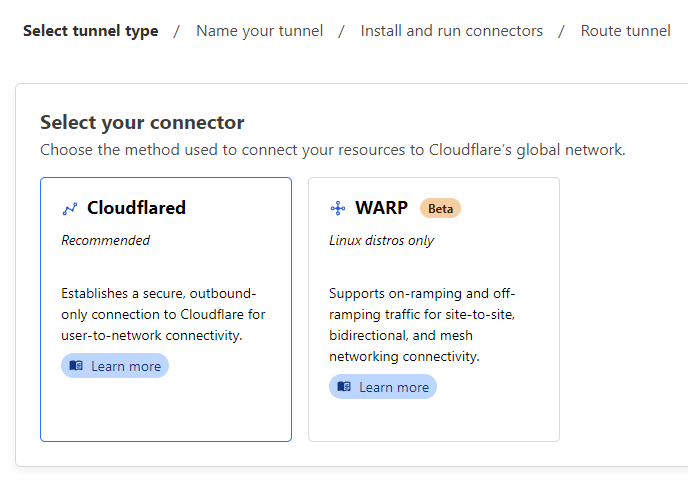
Select the "Cloudflared" connector type.
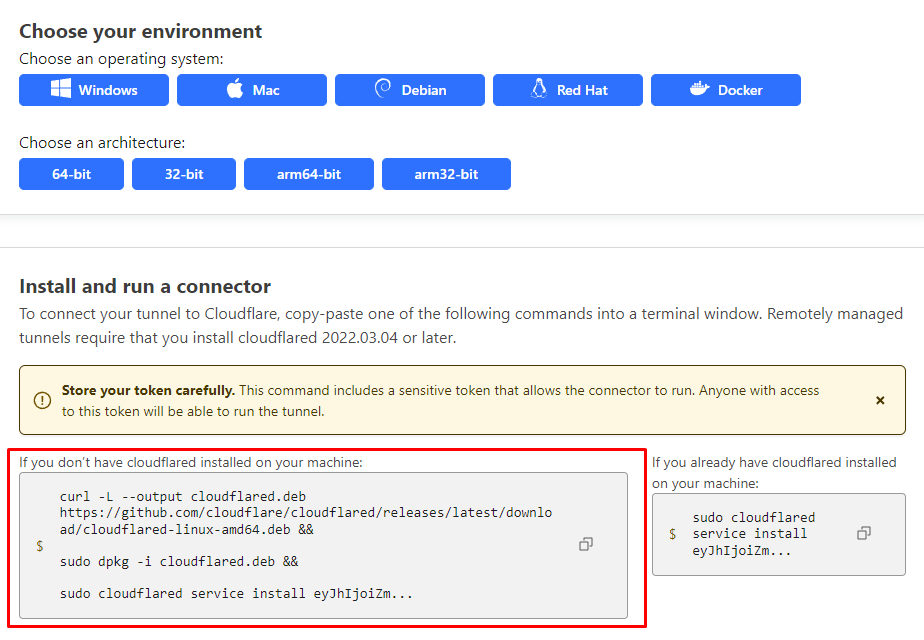
Provide a name for our tunnel and then follow the instructions to install the Cloudflared. In our example, we'll be installing Cloudflared on a Ubuntu server so I've selected Debian + 64-bit.
Simply paste the left code block onto the server.
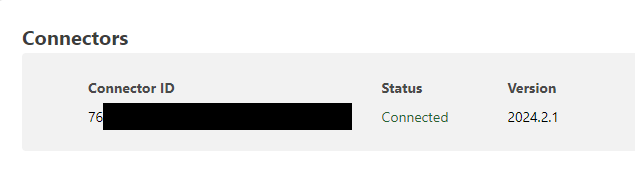
If successful, a connector should show up in the bottom section of this same page.
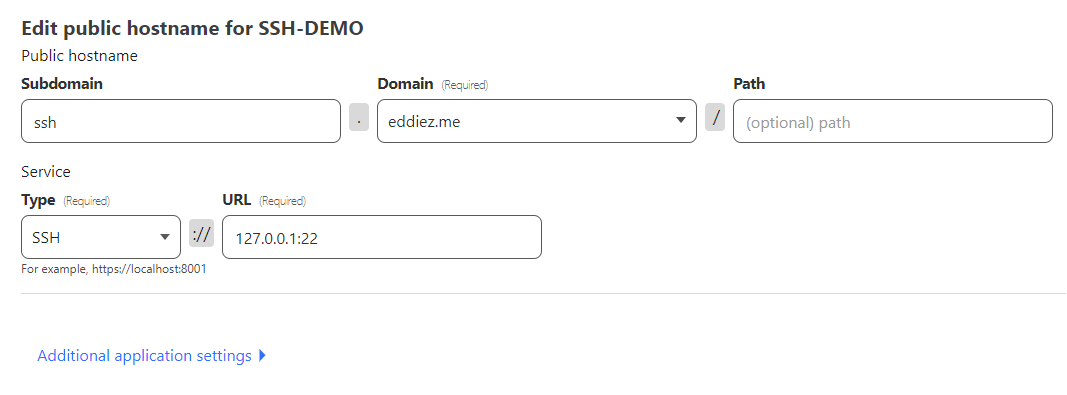
Finally configure a public route to the SSH service on the server.
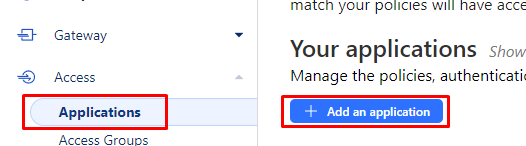
Creating the Remote Access Application
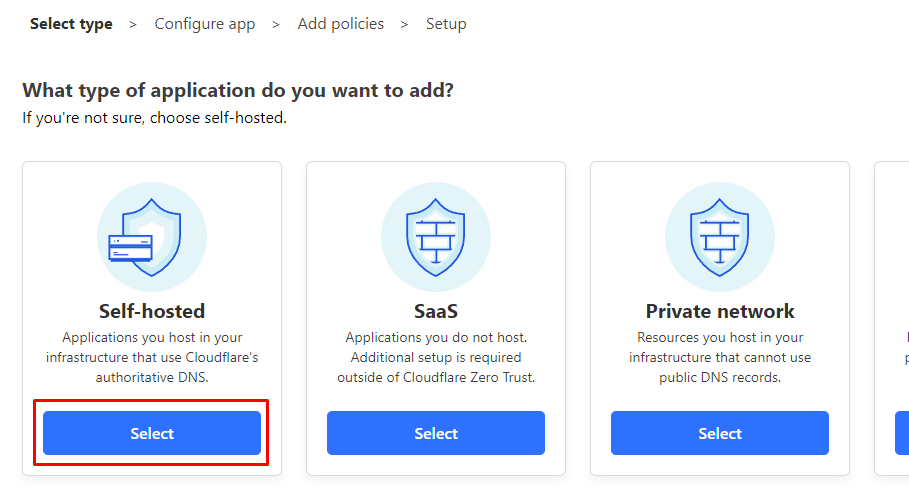
Navigate to the applications section and create a new application.
Select self-hosted.
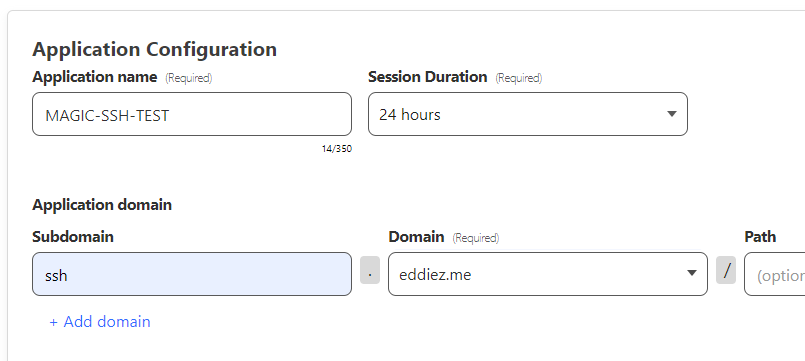
Give our application a name and set the Application domain to match what was configured previously in the tunnel. The rest of this section can be left default.
NOTE: By default the authentication method prior to SSH authentication is a Email One-Time PIN, if you'd like alternate pre-authentication options you can add other Identity Providers (e.g. Azure AD SSO) to select at this step.
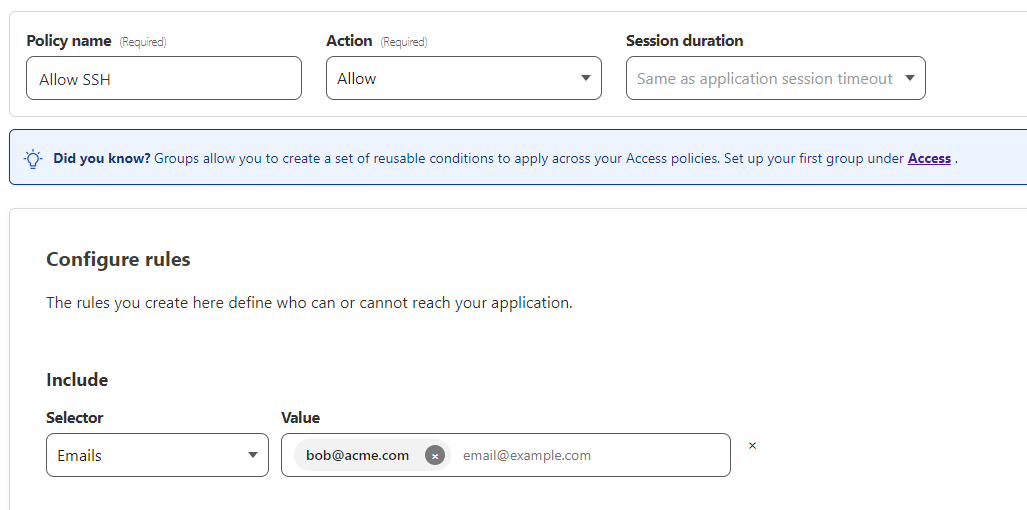
Next we need to setup a policy to allow/deny access based on a condition. We'll keep it pretty simple for our demo and simply allow access if the authenticated email matches "[email protected]".
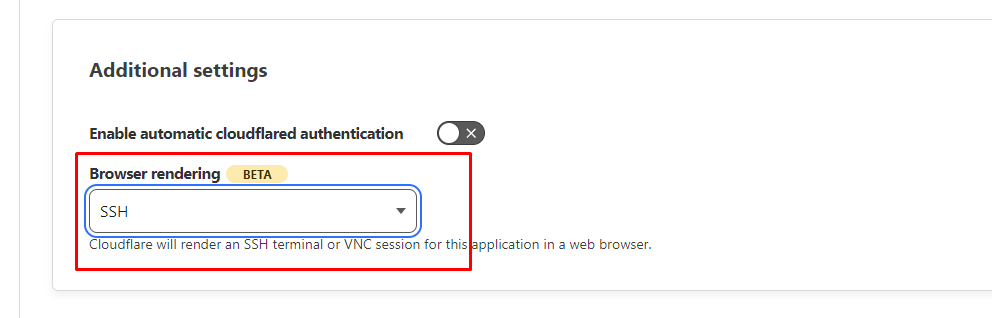
Finally, in the last screen make sure you enable SSH Browser rendering.
The Result
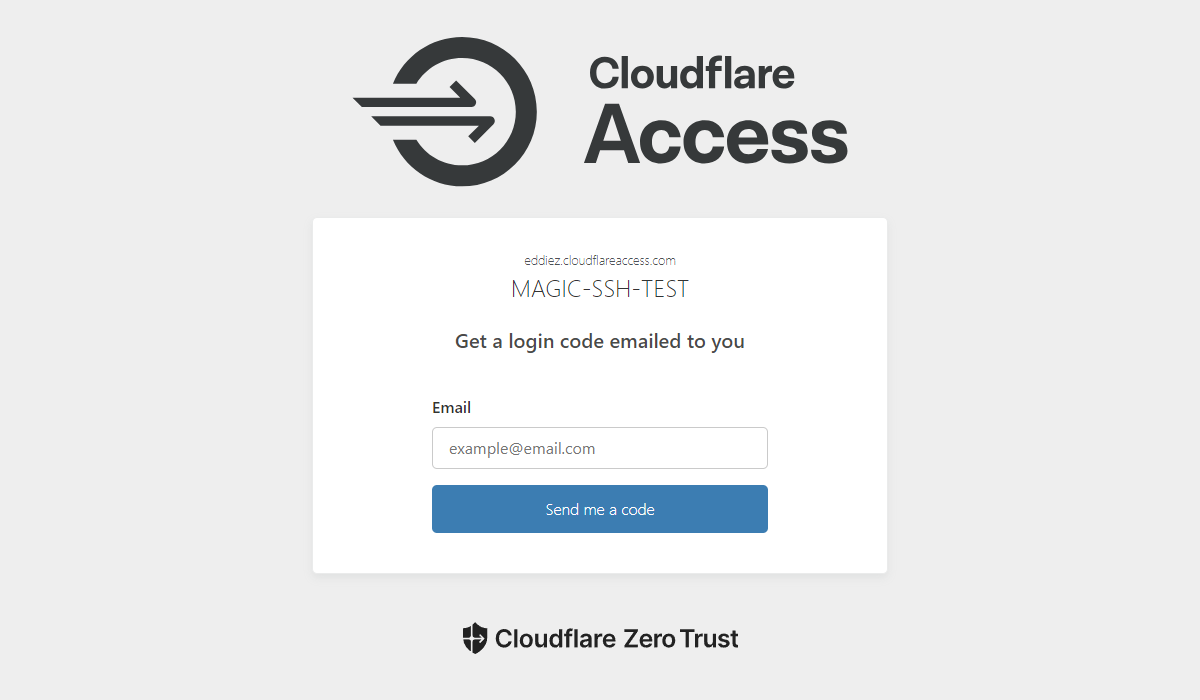
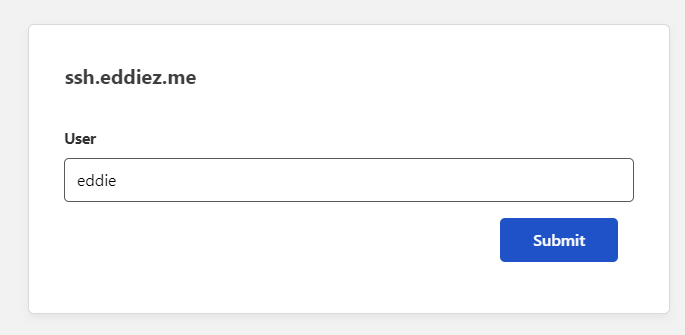
If everything's configured correctly, by browsing to ssh.eddiez.me we should be greeted by this login screen.

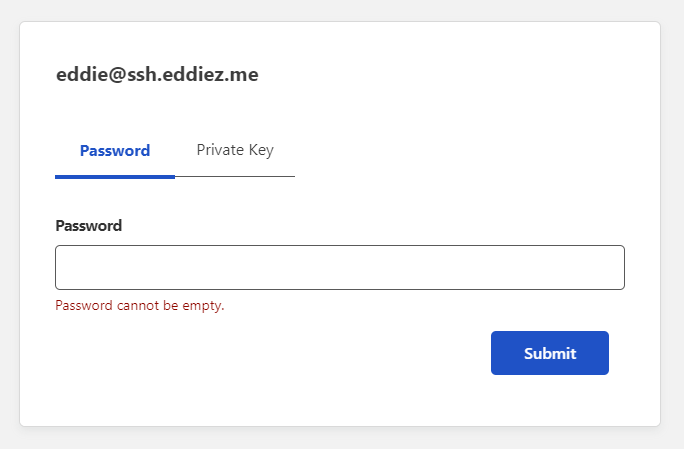
Upon authenticating correctly with a OTP, we are then asked to complete normal SSH authentication using a Username and Password/Private key.
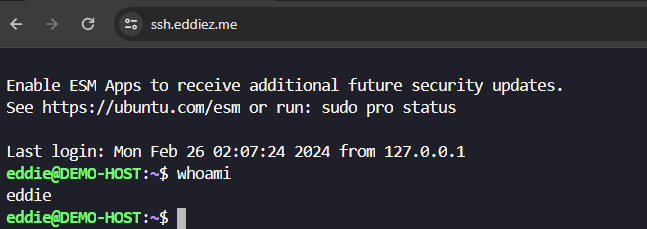
Once you've completed SSH authentication you've now got a browser based SSH session and pesky attacker and penetration testers won't be able to send a single packet to your server!
Additional reading:
- Documentation: https://developers.cloudflare.com/cloudflare-one/connections/connect-networks/configure-tunnels/remote-management/
- Native terminal connections by proxying through a Cloudflared client: https://developers.cloudflare.com/cloudflare-one/connections/connect-networks/use-cases/ssh/#2-connect-as-a-user