Network Segmentation Testing Guide
Network segmentation testing is a critical component of PCI DSS compliance. Doing it properly takes some thought and it can be easy to overlook misconfigurations without a plan.

On the surface, network segmentation testing seems straightforward. Can one part of the network talk to another, or not? In practice though, it's surprisingly easy to get wrong.
Planning
Proper planning defines test requirements. The PCI DSS segmentation testing guidance is focused on inbound network controls towards trusted networks.
The intent of segmentation is to prevent out-of-scope systems from being able to communicate with systems in the CDE or impact the security of the CDE.
But ideally, a segmented (trusted/protected zone) network segment enforces strict inbound and outbound traffic restrictions, including to the internet. We'll test for both.
To better explain this, lets define a hypothetical network:
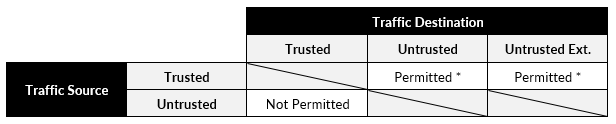
- Trusted Network Zone:
192.168.3.0/24
Hosts critical systems and sensitive data. Should only accept traffic from explicitly allowed sources. Should only be permitted limited outbound traffic. - Untrusted Network Zone:
172.16.1.0/24
Represents a less trusted environment (e.g. might contain supporting services like AD DS). - Untrusted External Network Zone:
0.0.0.0/0
Represents the internet. Outbound access should be tightly controlled. Only web based traffic to specific hosts for software updates is permitted.
With our network zones defined we can now draw up a matrix to represent the expected findings.
Tests
Once expected rules are defined we can talk about how to practically verify segmentation. There are two main methods to assess segmentation.
Host-to-Host (Point-to-Point) Testing
If you don't do this and just rely on subnet scans you may be missing things in your segmentation scans.
Attempt direct connections between specific source and destination IPs where ALL relevant ports are open on the destination host.
This can lead to false negatives.
Subnet-Wide Scans
These are fairly straightforward and are what most people consider when planning segmentation testing.
Host-to-Host Testing
To accurately test segmentation controls, you need root-level access to the destination host so you can bind to privileged ports and configure listening services.
In our example, we assume the destination host is running Linux.
We are effectively creating our own DIY http://portquiz.net/ that supports UDP as well.
Setup
Deploy a host in the destination network zone (e.g. on the internet) and then install ncat and socat.
sudo apt install ncat socat
Next, run the following script as root. It first configures iptables rules to redirect all incoming TCP and UDP traffic except for SSH on TCP port 22 to TCP and UDP port 12345, respectively. It then sets up listeners on those ports.
This effectively simulates a host with every port open.
#!/bin/bash

LISTEN_PORT=12345

# Flush existing rules
iptables -t nat -F

# Redirect all other TCP traffic to local listener
iptables -t nat -A PREROUTING -p tcp --dport 1:21 -j REDIRECT --to-port $LISTEN_PORT
iptables -t nat -A PREROUTING -p tcp --dport 23:65535 -j REDIRECT --to-port $LISTEN_PORT

# Redirect all UDP traffic to local listener
iptables -t nat -A PREROUTING -p udp --dport 1:65535 -j REDIRECT --to-port $LISTEN_PORT

# Start listeners
/usr/bin/ncat -lvkp $LISTEN_PORT &
/usr/bin/socat -T1 "UDP-RECVFROM:${LISTEN_PORT},fork" EXEC:'echo -n "open"' &To reset our target host, kill our listeners and remove the iptables rules.
# Check what we're going to kill before you kill it
pgrep -af 'socat|ncat'

# Kill socat and ncat
sudo pkill -f 'socat|ncat'

# Flush nat rules
iptables -t nat -F
Result
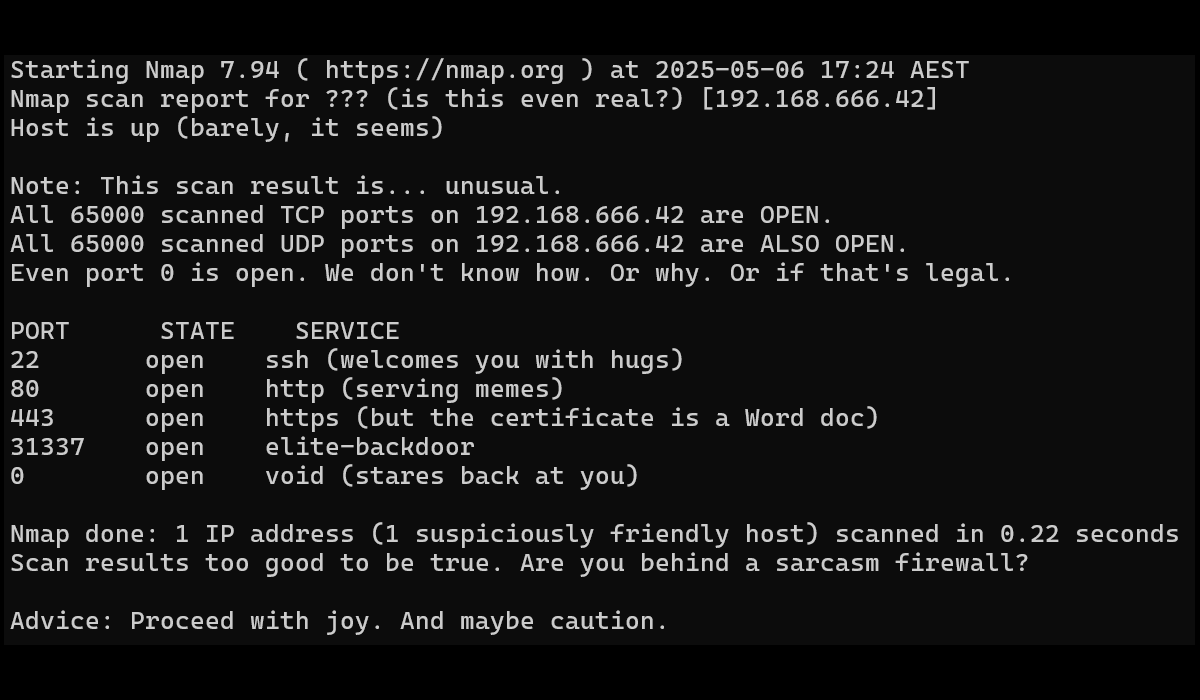
The result should be that on a TCP or UDP all ports nmap scan, ALL ports show as open.
└─$ cat tcp.nmap
# Nmap 7.95 scan initiated Mon May  5 11:18:32 2025 as: /usr/lib/nmap/nmap --privileged -p- -oA tcp -v 192.168.3.101
Nmap scan report for 192.168.3.101
Host is up (0.0015s latency).

PORT      STATE SERVICE
1/tcp     open  tcpmux
2/tcp     open  compressnet
3/tcp     open  compressnet
4/tcp     open  unknown
5/tcp     open  rje
6/tcp     open  unknown
7/tcp     open  echo
8/tcp     open  unknown
9/tcp     open  discard
10/tcp    open  unknown
11/tcp    open  systat
12/tcp    open  unknown
13/tcp    open  daytime
14/tcp    open  unknown
15/tcp    open  netstat
--- SNIP ---
65521/tcp open  unknown
65522/tcp open  unknown
65523/tcp open  unknown
65524/tcp open  unknown
65525/tcp open  unknown
65526/tcp open  unknown
65527/tcp open  unknown
65528/tcp open  unknown
65529/tcp open  unknown
65530/tcp open  unknown
65531/tcp open  unknown
65532/tcp open  unknown
65533/tcp open  unknown
65534/tcp open  unknown
65535/tcp open  unknown

Read data files from: /usr/share/nmap
# Nmap done at Mon May  5 11:18:42 2025 -- 1 IP address (1 host up) scanned in 9.80 seconds
Showing all lines that don't contain the word "open".
Subnet-Wide Scans
Subnet-wide scanning is relatively straightforward. The main consideration is deciding how many ports to scan.
By default, Nmap scans the top 1,000 ports for each scan protocol requested. This catches roughly 93% of the TCP ports and 49% of the UDP ports. With the -F (fast) option, only the top 100 ports are scanned, providing 78% TCP effectiveness and 39% for UDP. 
I'd recommend scanning all TCP ports as it's generally feasible and provides good visibility.
UDP scanning is a different story, it's significantly slower and less reliable (my suggestion is you aim for at least the top 100 most common UDP ports).
nmap -Pn -p- -n -oA tcp-full-scan 192.168.3.0/24
nmap -Pn -sU --top-ports 100 -n -oA udp-top100-scan 192.168.3.0/24