Google Pixel Root Guide
Ever wondered what your app's really doing behind the scenes? This guide walks you through how to root any Google Pixel phone.

Obtaining root access on Google Pixels is made relatively easy by the fact that the bootloader is easily unlocked AND Google publishes factory images. Root access is important if you're performing any sort of mobile application penetration testing.
While some details may differ between models, the process at a high level is the same across all the Pixels I've personally rooted (OG - sailfish, 3a, and a 6a). For the most part it boils down to 4 steps:
- Installing some tools
- Unlocking the bootloader
- Patching the bootloader
- Flashing our patched bootloader
Install Tools (ADB + Google USB Driver)
Plug in your phone and download the Google USB Driver.

Follow these instructions to install the driver.

Now download the the Android platform tools and unzip them.

Done.
Unlock the Bootloader
Next, we want to enabled developer options, unlock the bootloader and enable ADB.
Enabling Developer Options
Browse to Settings -> About phone.
Write down the Build number! We'll need it in a second.
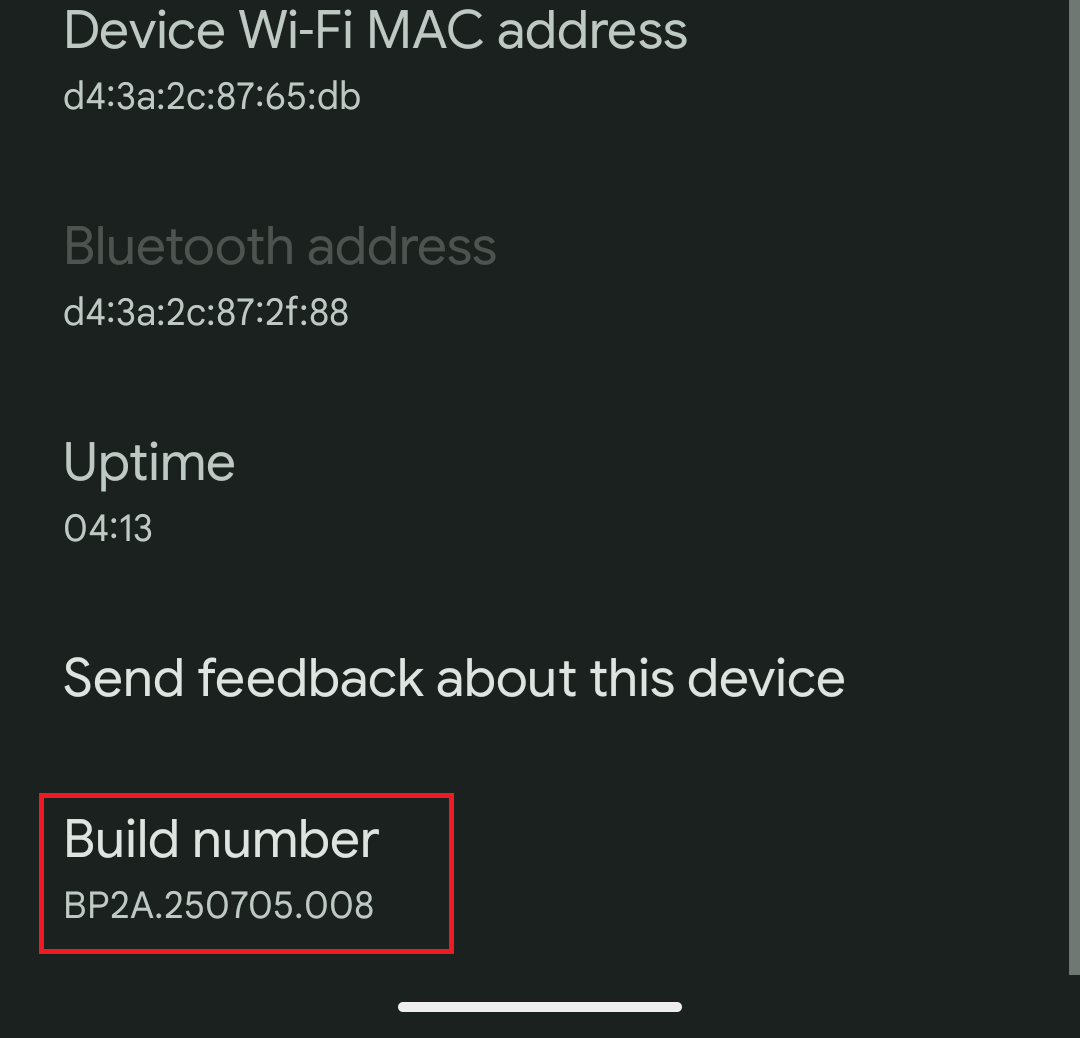
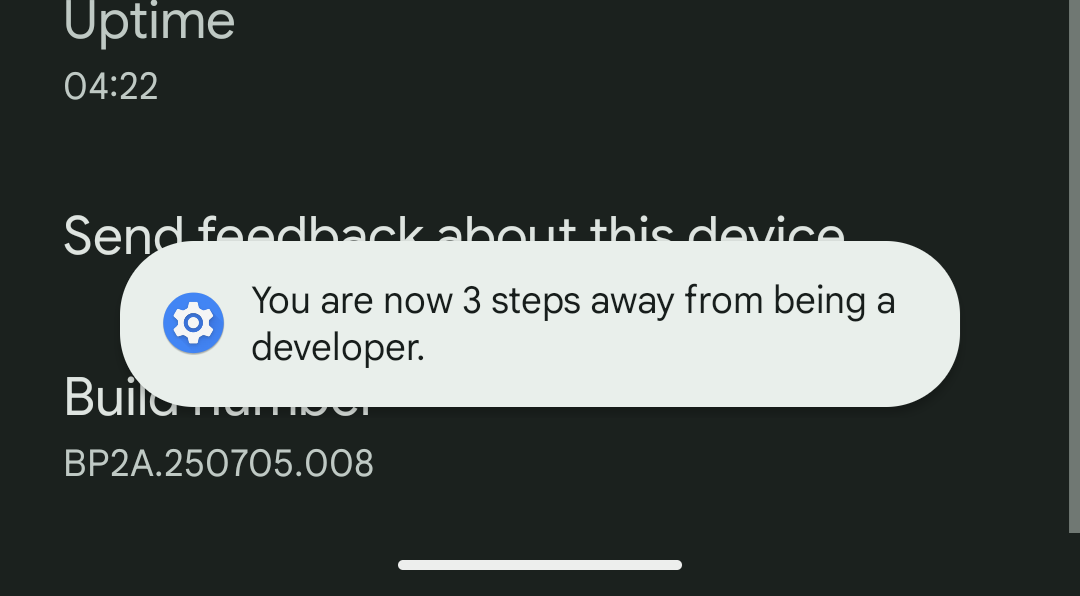
Tap the build number a few times to unlock Developer options.
OEM Unlocking + ADB
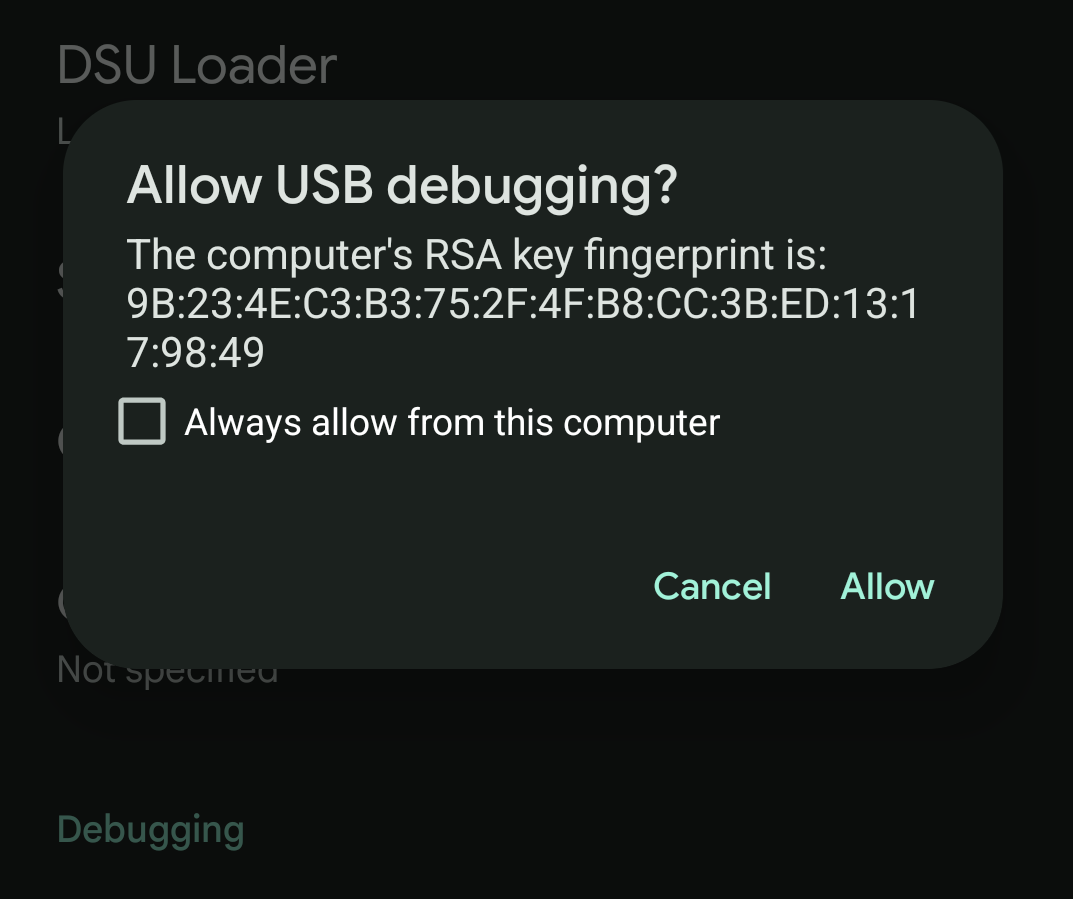
Browse to Settings -> System -> Developer options and check the boxes for 'OEM unlocking' and 'USB debugging'.

Unlocking the Bootloader
With a bit of luck if you open a command prompt at the location of the platform tools we downloaded earlier you should be able to run adb devices and see your phone there.
C:\Users\EddieZhang\Downloads\platform-tools>.\adb.exe devices
List of devices attached
29151JEGR00878  device
The first time you do this you'll need to allow USB debugging from your computer.
Next we can finally unlock our bootloader.
Run .\adb reboot bootloader to bring the phone into fastboot mode.
And then .\fastboot flashing unlock to unlock the bootloader.
C:\Users\EddieZhang\Downloads\platform-tools>.\fastboot flashing unlock
OKAY [  0.041s]
Finished. Total time: 0.043s
Use the volume keys to then select 'Unlock the bootloader' and confirm this with the power button.
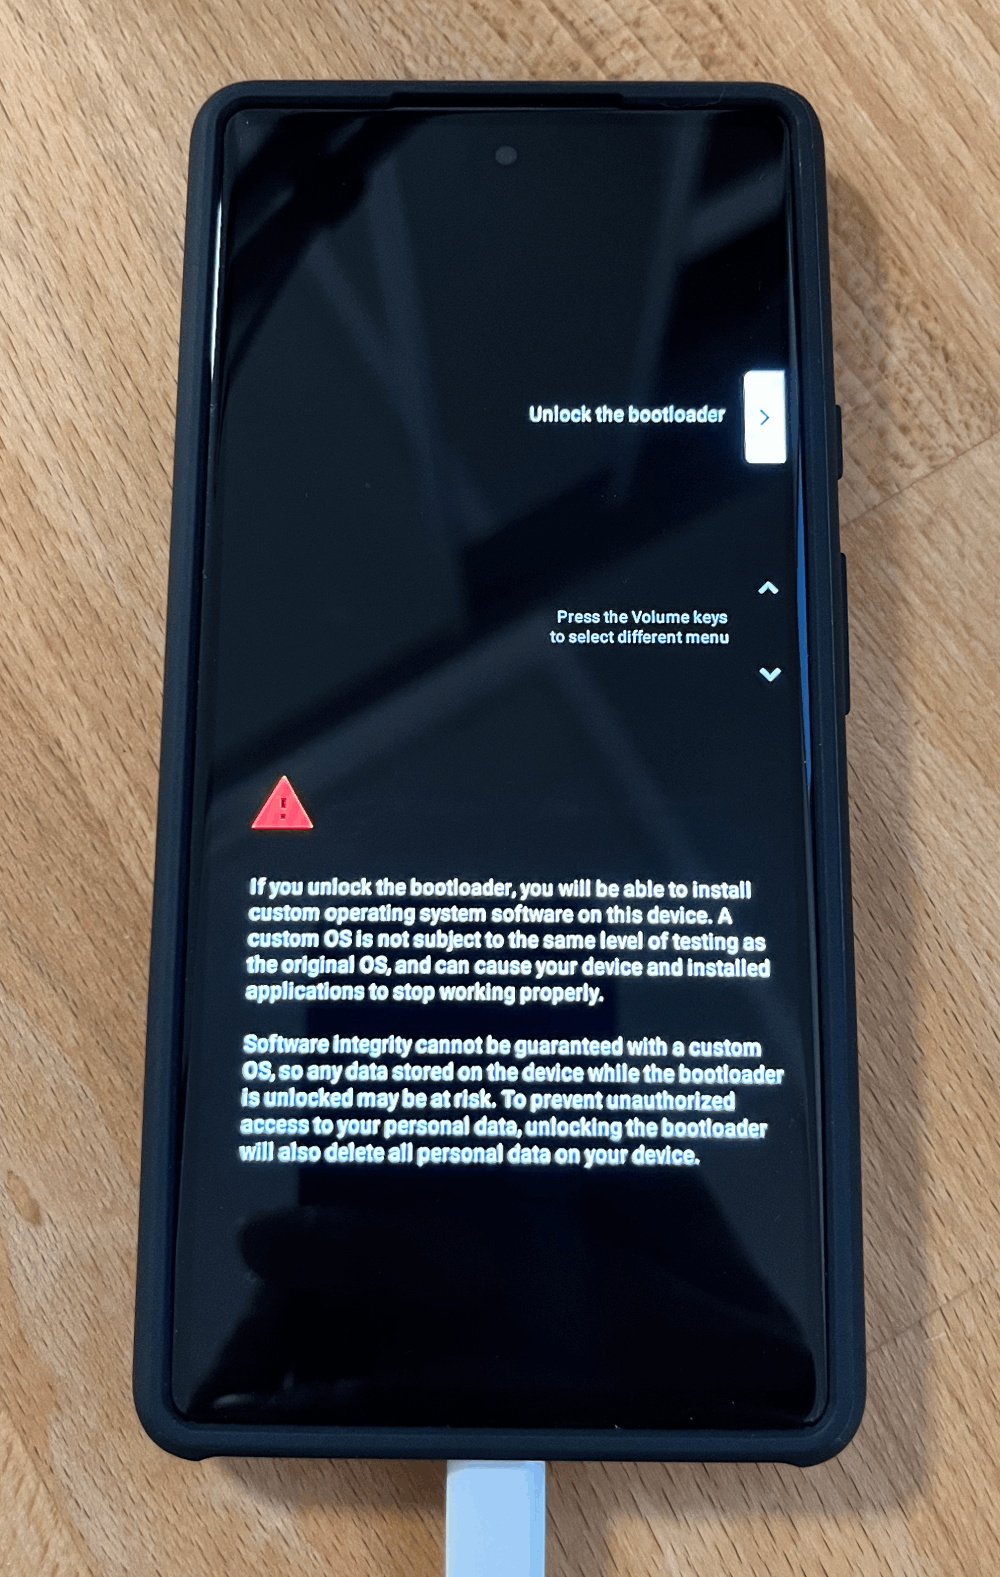
The text on screen should now show a line that says something along the lines of "Device state: unlocked".
Run .\fastboot reboot to bring us back into Android for the next step. Your Pixel now has an unlocked bootloader! 🎉
Patching Bootloader Image with Magisk
Downloading the Bootloader Image
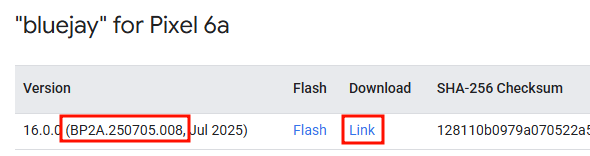
A full list of factory images for Pixel devices are published here.

Remember the build number we noted down earlier? Download the matching factory image for your phone.
The file we care about is inside a zip file inside the zip file we downloaded called boot.img.
Using the Pixel 6a image as an example.
bluejay-bp2a.250705.008-factory-128110b0.zip
|--flash-all.bat
|--flash-all.sh
|--image-bluejay-bp2a.250705.008.zip <-- INSIDE here
   |--boot.img <-- THIS GUY
   |--vendor.img
Copy this boot.img file into the same folder as our platform-tools, we'll be using it shortly.
Installing Magisk
After the phone reboots you'll need to go through the setup process again and then re-enable USB Debugging.
After USB debugging is enabled again, copy our boot.img onto the phone.
C:\Users\EddieZhang\Downloads\platform-tools>.\adb.exe push .\boot.img /sdcard/Download/
.\boot.img: 1 file pushed, 0 skipped. 128.9 MB/s (67108864 bytes in 0.496s)
Now we want to install Magisk on the phone.

Look for the release with the latest tag and download the .apk file from the release into the platform-tools directory.

C:\Users\EddieZhang\Downloads\platform-tools>.\adb install Magisk-v29.0.apk
Performing Streamed Install
Success
Open the Magisk app, we'll be using this to patch the bootloader. Follow the screenshots below.

The logs will show the name of the patched bootloader, we want to download this from the phone.
C:\Users\EddieZhang\Downloads\platform-tools>.\adb.exe pull /sdcard/Download/magisk_patched-29000_ivxOQ.img
/sdcard/Download/magisk_patched-29000_ivxOQ.img: 1 file pulled, 0 skipped. 39.6 MB/s (67108864 bytes in 1.615s)
Flashing the Bootloader
Reboot the phone back into the bootloader using .\adb reboot bootloader.
And finally flash the image and reboot.
C:\Users\EddieZhang\Downloads\platform-tools>.\fastboot flash boot .\magisk_patched-29000_ivxOQ.img
Sending 'boot_b' (65536 KB)                        OKAY [  1.469s]
Writing 'boot_b'                                   OKAY [  0.075s]
Finished. Total time: 1.554s
C:\Users\EddieZhang\Downloads\platform-tools>.\fastboot reboot
Rebooting                                          OKAY [  0.000s]
Finished. Total time: 0.002s
You're done! If you relaunch Magisk you should now see that Magisk shows as installed.
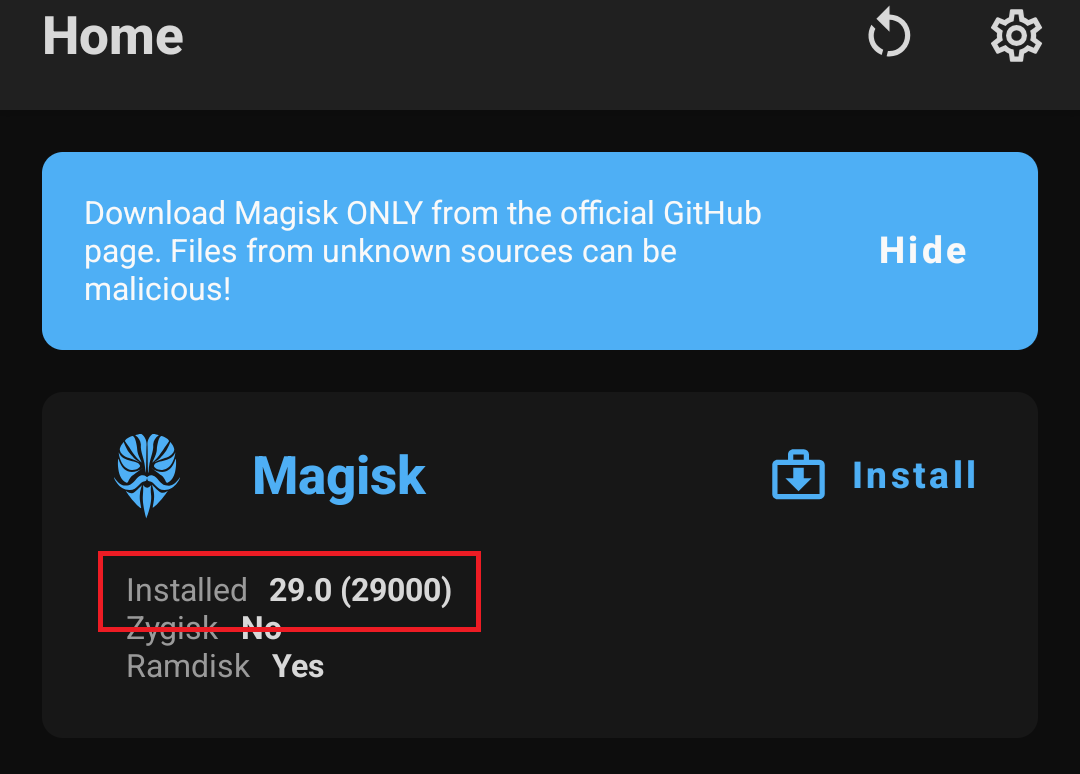
Additionally, if you try to run su whilst connected via .\adb shell you should be granted root after accepting a prompt from Magisk.
